Gone are the days of having to use a photo the way it was taken. With Adobe Express, now you can do a whole multitude of things to them to enhance their look and add a touch of personalization to them. Read on for some tips and tricks to take your photos from ordinary to extraordinary!
ADDING EFFECTS AND ADJUSTMENTS TO A PHOTO
There are endless possibilities when it comes to adding photo effects and adjustments in Adobe Express. Effects and adjustments are the “secret sauce” that achieves the look you want with your photos!
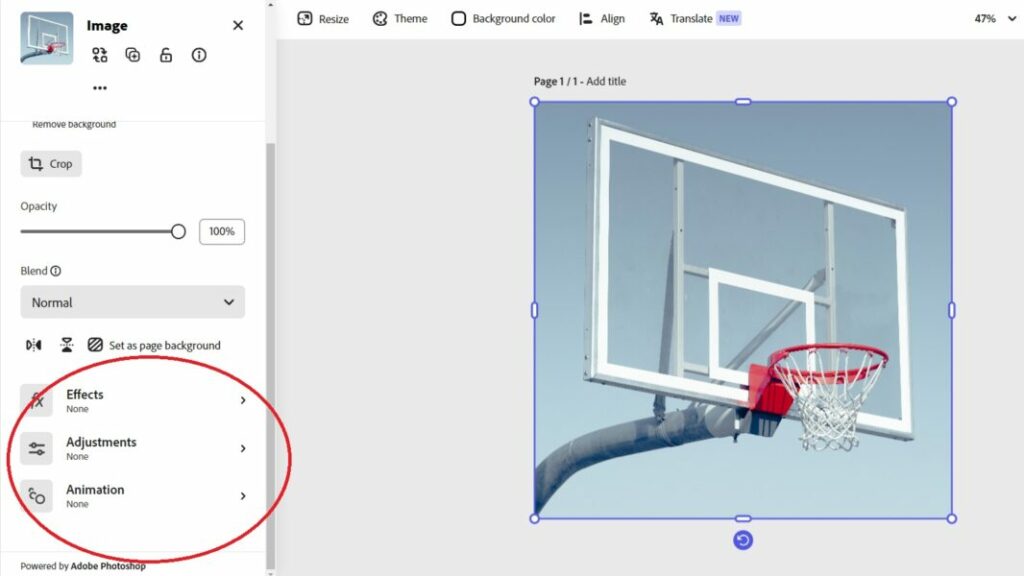
- Start by adding a photo to your canvas, then select the photo to see its properties appear on the left side of your screen. All of the photo effects live here!
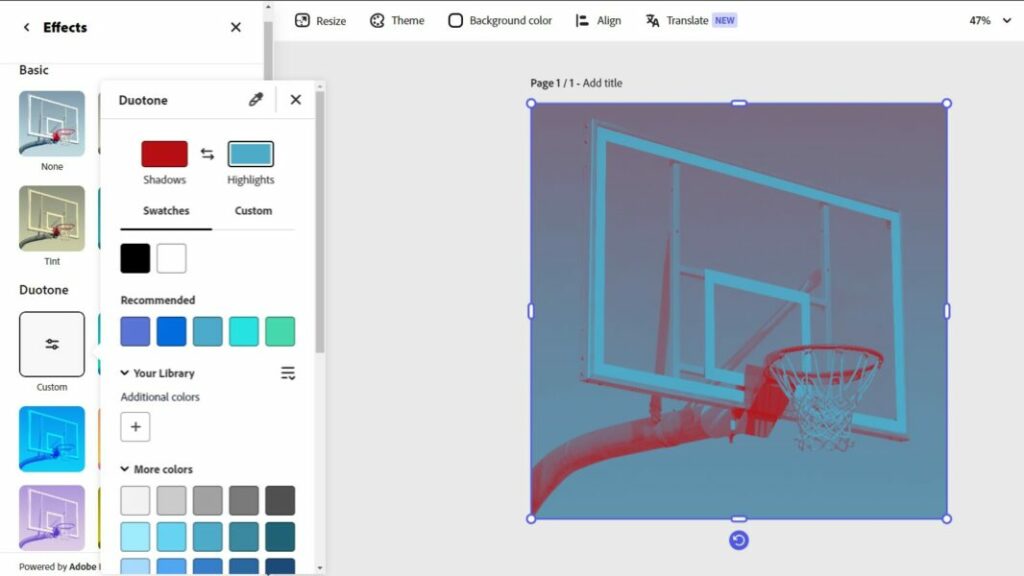
- When you click Effects, it brings up your basic colour options like Grayscale and Darken…but we want to have more fun with this photo so let’s look at more advanced choices like Duotone! In Duotone, each effect is preset, but you can change them through the Custom icon. Say your school colours are blue and red and you want the basketball hoop to be those colours…click the custom icon and then choose the colours you want the image to be. You can even save your colours in Your Library so you can find them easier later on.
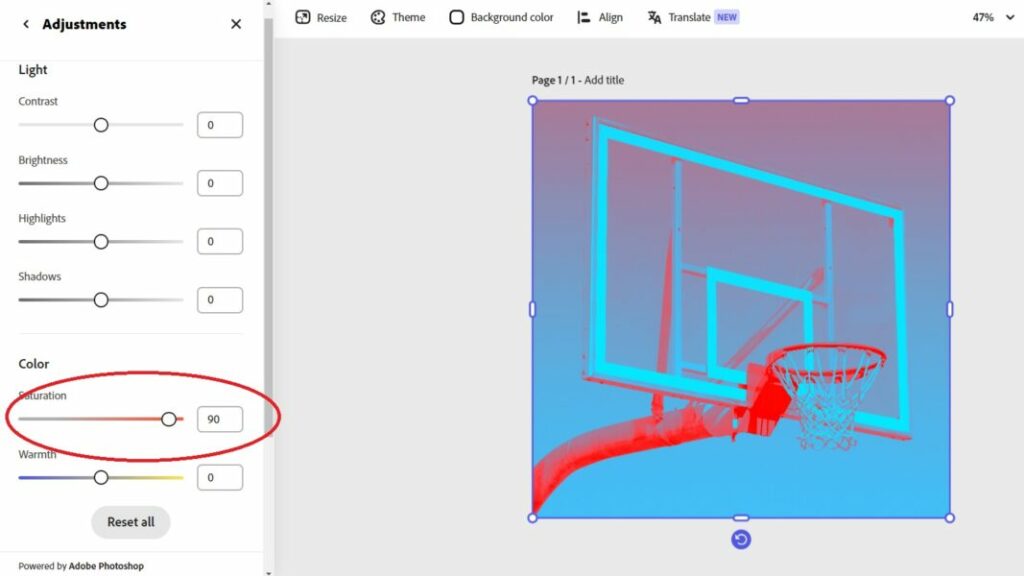
- Adjustments is the home to all of your classic filter options, like contrast, saturation, brightness and more. This is where you would fine tune the colours to be perfect. Maybe you want the red to be more saturated…simply slide the button to the right until you’ve reached the desired look.
Here are the effects and adjustments that you can make to photos in Adobe Express:
- Modify the opacity to show more or less of a background
- Change blend modes so you can merge colours and patterns
- Use grayscale
- Darken, tint, or colorize a photo
- Use duotones to bring out middle tones and highlights
- Create adjustments to make custom colours
REMOVING AND ADDING A BACKGROUND
Removing the background of a photo is one of the easiest ways to add personality and pizzazz to your yearbook project. When you remove the background, you can layer the subject onto something more exciting or combine it with other elements to create a seamless collage. It also helps if you want to focus on a specific element…you can clear out the distracting background.
To remove the background of a photo of your own, start on the Adobe Express Home page. Scroll down to Quick Actions and choose Remove Background. Upload your photo and let Adobe Express do its thing (if you want to remove the background of an image already in the Editor or an Adobe Stock image, simply choose the image then click “Remove Background” in the left properties panel).
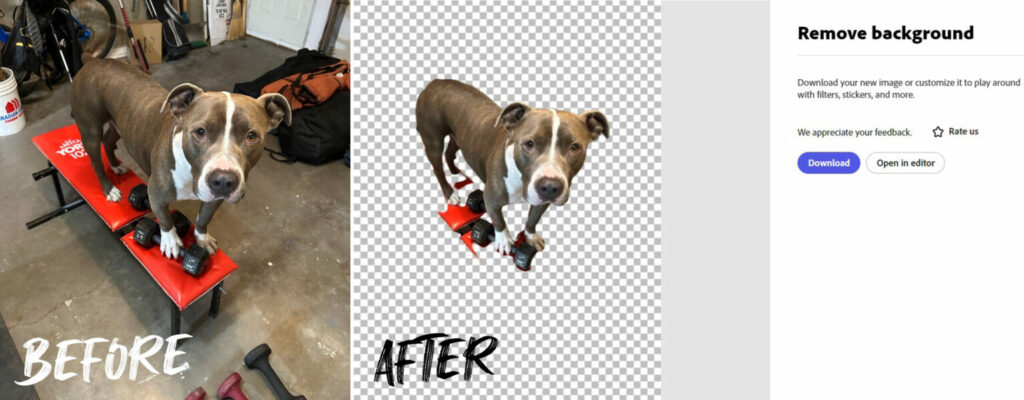
Sometimes you will need to tweak the photo after the background has been removed. Click Open In Editor and use the Erase tool to take out the last little bits you don’t want in the photo. You’re best to choose the Quick Selection brush, which will take out the appropriate bits with the click of your mouse. Be aware that if there is a lot of white in your photo, that may be removed by Adobe Express, thinking it’s part of the background (see the area circled in red below)!

Now you can either download the photo sans background as is, or you can add a new background, either by uploading a photo of your own or using one of the tens of thousands of Adobe Stock photos available to you. If you want to keep the transparent background when you download the image, it’s important to ensure you switch the background to NO FILL so that there is no white background when you start to work with it.
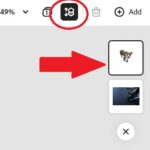
Let’s put this swole, weight-lifting dog in an actual gym. Click Media on the left (this is where you can upload your own photo or create a background using generative AI) and search photos. Find one you like and click on it. You’ll see that it pops up on your canvas in the upper left, and over top of the first image…not to worry! You can change the order of the layers either by clicking the LAYER STACK button (circled in red) or by dragging the bottom thumbnail image to the top (red arrow). Adjust the layers, size, etc, then text (if you want it) and voila, you’re done!

Remember, your Customer Service Representative is here to help if you need any help! For more ways to manipulate your photos, check out the below tutorials from Adobe Express:
How To Move and Edit Layers In Your Design
How To Blur or Sharpen Your Photos